
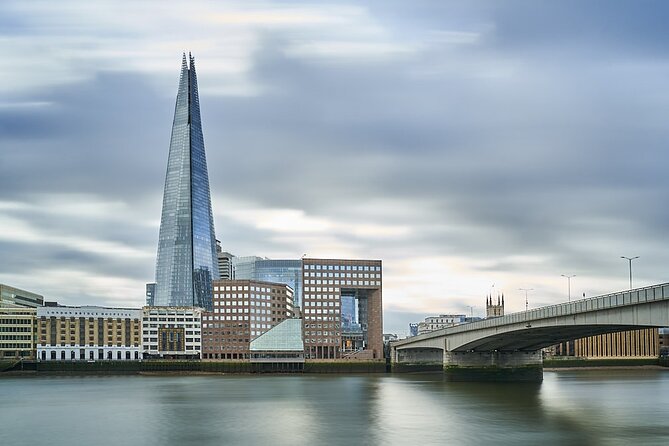
Reviewed · PHOTOGRAPHY SESSIONS
London Creative Photography Tour
London becomes a working photo studio on this long city walk. You start at Nelson’s Column and may finish near the Tower of London and Tower Bridge, shooting everything from lions and church façades to Big Ben, graffiti, bridges, river views, and street scenes. The guide, Jesus, focuses on practical ideas you can use with a phone or camera.
I like the private format, since your group gets the guide’s full attention rather than waiting for a large class to catch up. I also like the chance to test modern mirrorless cameras, lenses, tripods, and filters, while still bringing your own familiar equipment. The main caution is the pace: three hours is a short time for such a wide route, so you may need to accept quick stops or a shortened finish.
In This Review
- Key points at a glance
- Starting with street photography around Trafalgar Square
- From Admiralty Arch to Big Ben and Westminster Abbey
- New views of Westminster from the London Eye side
- Covent Garden, Charing Cross, and real street scenes
- Waterloo Bridge, Southbank, and Blackfriars Bridge
- St. Paul’s to Millennium Bridge and the riverfront
- Tate Modern, Shakespeare’s Globe, and the Tower route
- What Jesus adds to the experience
- Is $142.67 a fair price?
- What to bring and how to prepare
- Who should book this London photo walk?
- Should you book it?
- FAQ
- Where does the London Creative Photography Tour begin?
- Where does the tour finish?
- How long does the photography tour last?
- Do I need to bring my own camera?
- Is coffee or tea included?
- What languages are available?
Key points at a glance
- Start with hands-on instruction at Trafalgar Square: Learn basic photography ideas while photographing Nelson’s Column, the National Gallery, Admiralty Arch, and the Landseer lions.
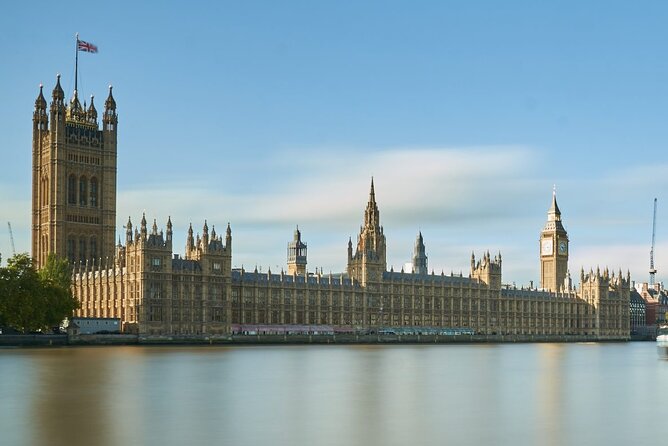
- Build better Big Ben compositions: Photograph the Palace of Westminster and Westminster Abbey from Parliament Square, then try new angles from the Thames.
- Use London’s streets as your subject: Covent Garden, Charing Cross, Leake Street, Chinatown, and other central areas provide people, color, movement, and texture.
- Walk a serious stretch of central London: The route can pass the London Eye, Waterloo, Southbank, Blackfriars Bridge, St. Paul’s Cathedral, and Millennium Bridge.
- Finish among major river landmarks: If time allows, you may photograph Tate Modern, Shakespeare’s Globe, London Bridge, The Shard, HMS Belfast, the Tower of London, and Tower Bridge.
- Get a short refreshment break: Coffee or tea is included, giving you a moment to compare progress and discuss the techniques you have tried.
Starting with street photography around Trafalgar Square
The tour begins beside Nelson’s Column in Trafalgar Square, one of the best places in central London to learn how to find photographs in a crowded setting. You are not simply pointed toward a famous monument and sent off to snap it. The opening walk introduces basic photographic concepts as you work with real subjects around the square.
You can photograph Nelson’s Column, the United Kingdom Landseer lion statues, the National Gallery, Admiralty Arch, and St. Martin-in-the-Fields church. Each gives you a different exercise. The lions invite you to think about scale and foreground detail. The column and arch call for lines and symmetry. The church and gallery offer architectural shapes, changing light, and busy surroundings.
This is a useful beginning because you learn to look beyond the obvious postcard view. Trafalgar Square is visited by Londoners and tourists, so there are plenty of moving subjects for street photography. You might work on timing, framing, or separating one person from a busy background. The guide can adjust the advice to your phone, compact camera, or more advanced equipment.
The square is also an easy meeting point. It is near public transportation, and Nelson’s Column is clear to locate. Bring your camera ready to use, with enough battery and storage for a few hours of practice.
A few more London days worth a look
- London: Private Photoshoot with Video Clip Option
★ 4.8 · 182 reviews - Professional Photoshoot in London Photographer
★ 5.0 · 102 reviews - Private landmarks photoshoot for families and couples
★ 5.0 · 92 reviews
From Admiralty Arch to Big Ben and Westminster Abbey
From Trafalgar Square, the route heads down The Mall and past Admiralty Arch toward Horse Guards Parade and The Cenotaph. These stops give you a strong contrast between formal ceremonial spaces and the casual movement of the city around them.
At Parliament Square Garden, the focus shifts to some of London’s most familiar buildings. You can photograph the outside of the Palace of Westminster with Big Ben, along with Westminster Abbey. The challenge here is familiar to anyone who has tried to photograph London’s famous clock tower: the most recognizable view is often the least personal.
That is where creative guidance matters. You may work on angles, composition, reflections, scale, or the way surrounding buildings frame the tower. The point is not just to record that you were there. You are encouraged to create a photograph with a clear visual idea.
Since this is a walking tour rather than an indoor sightseeing visit, you will not tour the interiors of Parliament or Westminster Abbey. The value comes from learning how to photograph their exteriors and how to use the spaces around them.
New views of Westminster from the London Eye side
The walk crosses the River Thames toward the London Eye. From this side of the water, you get a different relationship between Big Ben, the Palace of Westminster, the river, and the surrounding bridges. This is one of the strongest parts of the route for practicing composition because a small change in position can alter the balance between architecture, water, sky, and passing people.
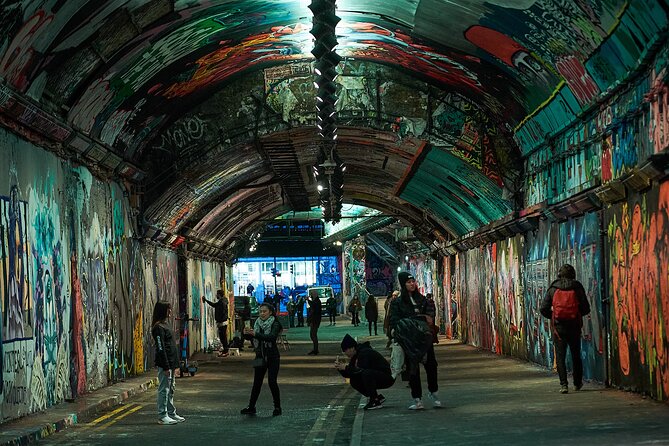
You will also pass Leake Street, Golden Jubilee Bridges, and the Waterloo area. Leake Street is especially useful if you want something less formal than royal buildings and grand civic architecture. Its graffiti tunnel brings color, lettering, texture, and strong lines into the session.
Golden Jubilee Bridges give you another chance to work with repeating structures and leading lines. If you use a phone, you can practice clean vertical framing and exposure control. If you use a camera with interchangeable lenses, you can compare a wider view with a tighter architectural composition.
One practical point: this tour asks you to keep moving. You are likely to stop for instruction and photographs, but it is not designed as a slow portrait session at every landmark. If you need a long time to set up a tripod or carefully bracket each shot, you may prefer to focus on a few techniques rather than trying to photograph every location in depth.
Covent Garden, Charing Cross, and real street scenes
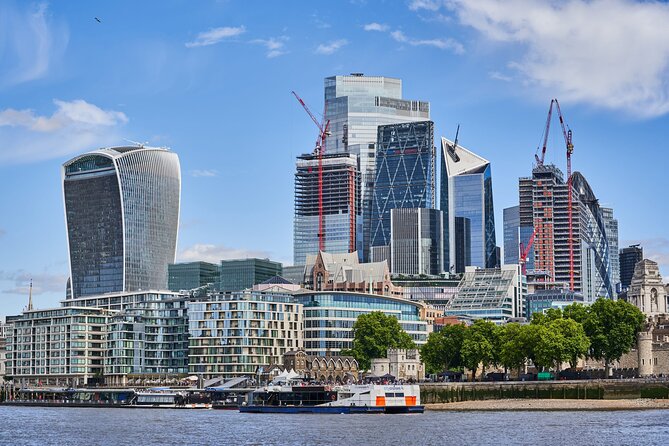
After crossing back toward Embankment, the route continues through Charing Cross and Covent Garden. These areas are well suited to street photography because you can work with pedestrians, performers, shopfronts, market details, and changing layers of movement.
The appeal here is less about collecting famous monuments and more about learning to notice ordinary scenes. A good street image may depend on waiting for the right person to enter the frame, finding a clean background, or using a doorway and pavement to create depth.
A past outing with Jesus also included Chinatown and Buckingham Palace, along with other major central London sights. Those places are not all listed in the planned sequence, so you should not treat every one as guaranteed. The route can depend on time, walking speed, and what your group wants to photograph.
The private setup helps here. You can tell Jesus if you prefer people photography, architecture, night-style effects, or phone photography. With only your own group participating, you do not have to follow a fixed lesson designed for strangers with very different skill levels.
Something completely different for your London days:
- London: The London Eye Entry Ticket
★ 4.6 · 35,875 reviews - From London: Harry Potter Warner Bros Studio Tour
★ 4.7 · 26,588 reviews - London: Westminster to Greenwich River Thames Cruise
★ 4.5 · 22,836 reviews - Magical London: Harry Potter Guided Walking Tour
★ 4.7 · 22,044 reviews
Waterloo Bridge, Southbank, and Blackfriars Bridge
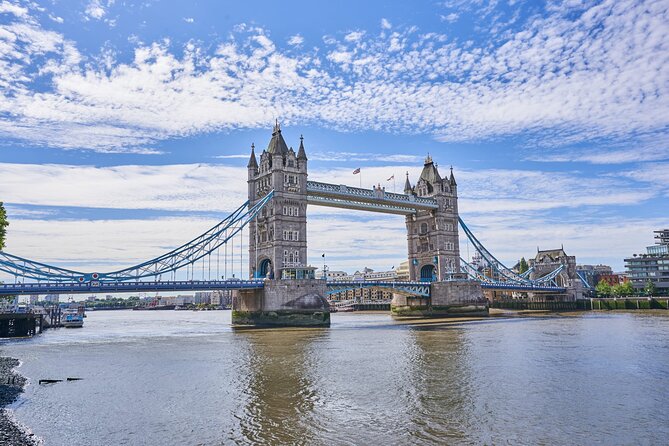
The route then crosses Waterloo Bridge and follows the river through the National Theatre and Southbank area. This section gives you a mix of modern cultural buildings, open river views, bridges, and public spaces.
Waterloo Bridge is a particularly useful viewpoint because the river opens out on both sides. You can look back toward Westminster or along the Thames, using the bridge rails and road lines to guide the eye. The exact best composition will depend on the light and the position of the crowds, so this is a good place to apply the techniques introduced earlier rather than simply repeat them.
The walk continues past the historic Blackfriars Bridge, known for its iron arches, stone carvings, and river views, before reaching St. Paul’s Cathedral. Here you can shift from broad city views to more detailed architectural work. Look for repeated arches, carved decoration, and ways to show the cathedral in relation to the surrounding city.
The route crosses several bridges, and that matters for comfort. Three hours on foot through central London requires a moderate level of fitness. Wear shoes you can walk in and keep your camera bag light. You do not need to bring every lens you own, especially since additional equipment may be available to test.
St. Paul’s to Millennium Bridge and the riverfront
Near St. Paul’s Cathedral, the tour heads toward Millennium Bridge. This stretch links one of London’s most historic landmarks with one of its most recognizable modern structures. The bridge’s straight lines and open steel design create a natural setting for symmetry, scale, and perspective exercises.
By this point, you will likely have a short break for coffee or tea. That pause is practical, not decorative. You can rest your feet, review a few images, and talk through what has worked so far. A quick check of your camera battery and storage card is sensible before the final stretch.
The experience aims to cover a great deal, and the guide may use this pause to judge how much farther the group can reasonably go. That flexibility is helpful, but it also means the ending is not as fixed as a compact walking tour. The planned finish can extend along the north riverside and then toward the Tower area, but time may limit how many of the final sights you reach.
Tate Modern, Shakespeare’s Globe, and the Tower route
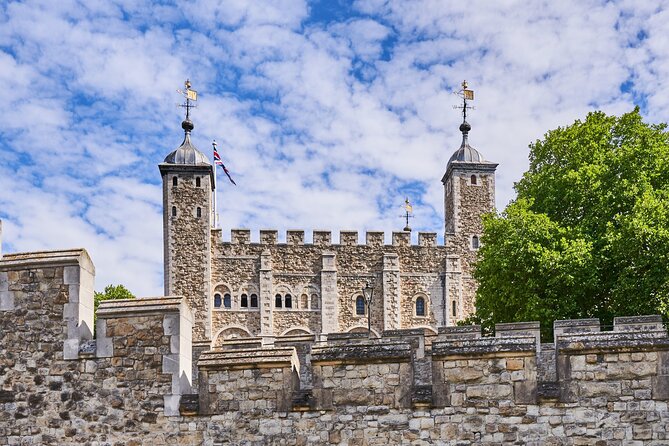
If there is enough time, the riverside section can include Tate Modern, Shakespeare’s Globe, London Bridge, and The Shard. These sights offer a strong mix of old and new London. The Globe gives you historic theatrical character, Tate Modern provides a bold modern exterior, and The Shard changes the skyline scale completely.
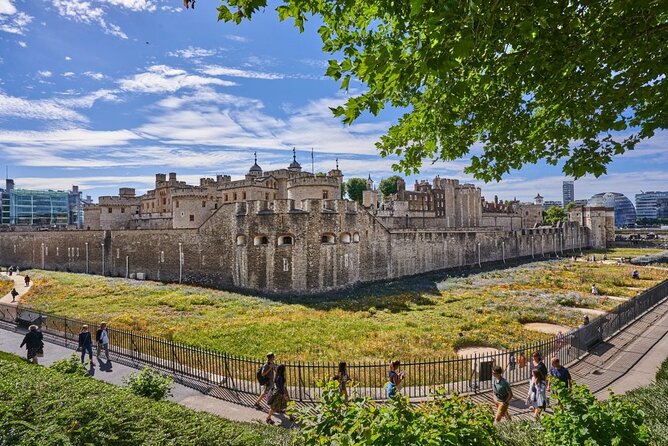
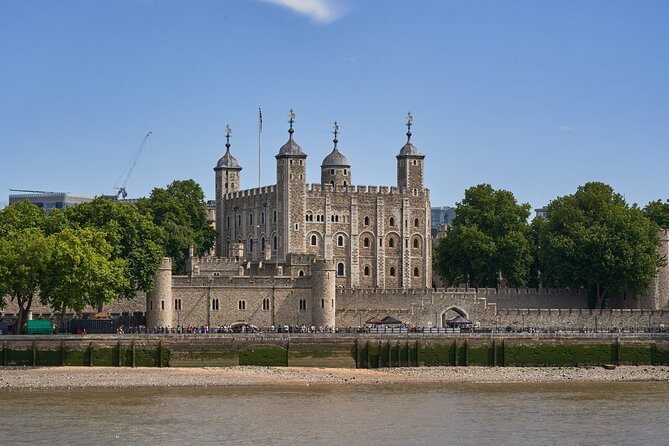
You may also see HMS Belfast before reaching the Tower of London and Tower Bridge. HMS Belfast gives you an industrial and maritime subject beside the river. The Tower of London offers stone walls and older architectural forms, while Tower Bridge supplies towers, suspension lines, and one of the city’s most recognizable silhouettes.
Tower Bridge is a fitting photographic finish, but remember that the tour does not necessarily end where it starts. You begin at Nelson’s Column and finish in a different location, with the route potentially ending near the Tower of London and Tower Bridge. Plan your onward journey rather than assuming you will return to Trafalgar Square.
The itinerary is ambitious for three hours. I would treat the listed route as a menu of possible photographic zones, not a promise that you will spend equal time at every stop. If reaching the final bridge matters most to you, say so at the beginning. If learning slowly matters more, choose fewer locations and give the guide room to teach.
What Jesus adds to the experience
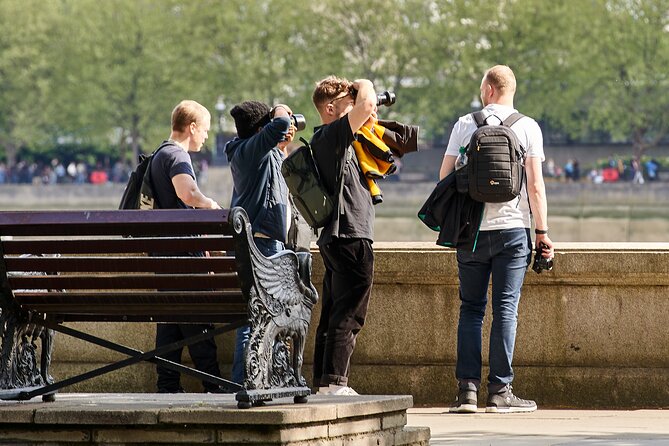
The strongest praise for this tour centers on Jesus’s ability to teach and suggest creative ways to see London. One detailed experience with him included the underground graffiti tunnel, the Thames, Covent Garden Market, Chinatown, City Hall, Westminster Abbey, Buckingham Palace, and other major sights, along with a lesson in creative photography.
That combination is important. A guide who only points out monuments gives you a sightseeing walk. A guide who discusses how to frame, time, and shape an image gives you a skill you can use after the tour ends.
You can also ask to test newer mirrorless cameras with different lenses and accessories such as tripods and filters. This does not replace bringing your own camera. Instead, it gives you a chance to handle equipment you may be considering, or to see how a different lens changes a familiar London view.
The tour is offered in English or Spanish. Since it is a private activity, you can keep the instruction at a level that suits your group. A beginner can work on basic concepts, while someone with more experience can ask for help with creative compositions and urban techniques.
Is $142.67 a fair price?
At $142.67 per person, this is not the cheapest way to see central London. You are paying for a private, photography-focused walking experience rather than a standard city highlights tour. The value depends heavily on whether you plan to use the instruction.
For a group that wants personal feedback, the price can make sense. You get roughly three hours with a guide, a walking route through many major areas, coffee or tea, and access to try additional photography equipment. The private format is especially useful if two people in your group have different cameras or skill levels.
The value is weaker if you only want quick snapshots of Big Ben and Tower Bridge. You can see many of these areas on your own with public transportation and a map. You should book this experience if you want to improve how you photograph them, not simply tick them off.
There is no transportation included, including taxi service or hotel and airport pickup. That is easy to manage because the tour begins near public transportation, but you need to arrange your own way to Nelson’s Column and from the final location.
What to bring and how to prepare
Bring your own camera or phone. The guide can provide opportunities to test other equipment, but your main practice will be with the device you already know.
A small setup is best. A phone, one camera body, and one versatile lens will keep the walk comfortable. If you want to try a tripod, filters, or another lens, you can do so during the equipment demonstrations rather than carrying a heavy kit all day.
You should also bring:
- A fully charged battery and spare storage if available
- Comfortable walking shoes
- Weather protection suitable for London
- A small bag that leaves your hands free
- A willingness to photograph people and ordinary street details, not only landmarks
Free cancellation is available if you cancel at least 24 hours before the local start time. Changes or cancellations made less than 24 hours before the start are not accepted for a refund.
Who should book this London photo walk?
I would recommend it most to beginner and intermediate photographers who want a friendly lesson in real city conditions. You will get more from the tour if you enjoy experimenting rather than waiting for a perfect postcard scene.
It also suits couples, families, or friends who want a private activity built around a shared interest. The English or Spanish language choice is useful, and the guide can focus on your group instead of a large mixed class.
You may want to skip it if you dislike long walks, need a fixed endpoint, or want extended time inside museums and historic buildings. This is an outdoor photography session. Its main subjects are London streets, exteriors, bridges, river views, and public spaces.
Should you book it?
Book this tour if you want to return home with better ways to photograph London, not just a full memory card. The private instruction, Jesus’s creative approach, equipment testing, and broad route give it real value for people who want practical help.
Go in with realistic expectations. Three hours cannot give you a slow, detailed shoot at every stop from Trafalgar Square to Tower Bridge. Decide whether you prefer more teaching or more locations, wear good shoes, and confirm your preferred priorities at the start. For an active photographer who wants personal guidance and a broad look at central London, this is a strong choice.
FAQ
Where does the London Creative Photography Tour begin?
It begins at Nelson’s Column, A400 Trafalgar Square, London WC2N 5DS, UK.
Where does the tour finish?
The activity ends in a different location from the meeting point. The planned route can finish around the Tower of London and Tower Bridge.
How long does the photography tour last?
The walking tour lasts approximately three hours.
Do I need to bring my own camera?
Yes. You must bring your own camera, though you may also be able to test newer mirrorless cameras with different lenses and accessories such as tripods and filters.
Is coffee or tea included?
Yes. Coffee and/or tea are included, with a break likely during the walk toward Millennium Bridge.
What languages are available?
The tour is available in English or Spanish.
Latest arrivals on the London list
- Easy Access Tower of London Royal Secrets & Scandals Tour★ 5.0 · 3 reviews
- Stonehenge Special Access Guided Morning Tour from London★ 4.5 · 3 reviews
- Shoreditch & East London Walking Tour with a Local, Custom & Private★ 5.0 · 3 reviews
- Madame Tussauds London Fast Track and Champagne Experience★ 3.5 · 3 reviews
- London Private Brixton Tour with a Local – Culture & Stories★ 4.9 · 3 reviews
- Private Full Day Tour – Fast Track Tower of London and Lunch★ 4.6 · 3 reviews
- Private transfer from London Heathrow Airport to Southampton★ 5.0 · 3 reviews
- London Soho District – Guided Walking Tour 12 guests 2,5h★ 4.8 · 3 reviews
Photography Sessions, compared.
Professional Photoshoot in London Photographer
Read our review →
30 Major London Attractions Walking Tour With Photos
Read our review →
Browse the lists this tour appears in